Garden Play and Crafts
Painting Pots and Plant Markers
Paint terracotta pots and make plant markers with children: preparing the surface, choosing paint that lasts outdoors, and labelling a family vegetable bed.
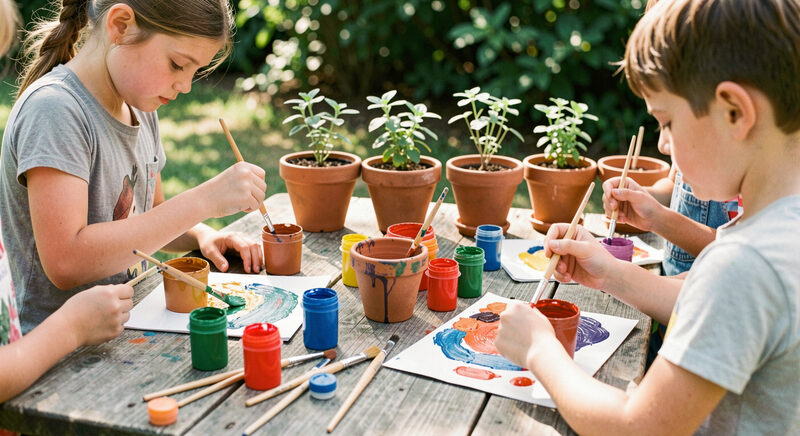
Painted pots and hand made plant markers turn a vegetable bed into something a child recognises as theirs. They are cheap, they can be made on a wet afternoon, and they have a use beyond the making: a labelled row is easier to look after, and a pot that a child painted is a pot a child will remember to water. This guide covers preparing the surface, choosing paint that survives outdoors, and making markers that last a season.
Preparing terracotta pots
Terracotta takes paint well once it is clean. Scrub new pots with water to remove dust, and let them dry fully. Old pots need a little more work: scrub off algae and salts with a brush, and let them dry. If the pot is to hold a plant straight away, it is worth sealing the inside with a coat of clear varnish or lining it with a plastic pot, so that watering does not lift the paint from the inside out. Seal the outside only after painting, or the paint will not grip.
Terracotta is porous, so it will draw moisture through the paint if the pot is watered heavily. A coat of primer made for terracotta, or a watered down PVA glue, gives the paint something to hold on to and slows the flaking. Let each coat dry before adding the next.
Paint that lasts outdoors
Not all paint survives rain and frost. Water based craft paint is easy for children to use and easy to clean up, but it needs a protective coat of outdoor varnish once it is dry, or it will wash off in the first wet week. Acrylic paint is more durable and still suitable for older children with supervision. Whatever is used, finish with a clear exterior varnish or a matt sealer, applied by an adult in a well ventilated spot.
Set out a limited palette on a washable cloth, keep a pot of water for rinsing, and let the children work in layers. A base colour, a simple pattern, and a name or a picture are enough. Avoid painting the rim where a hand will grip, because wet paint and small hands do not mix, and let the pots dry fully before planting.
Plant markers that survive the season
A marker has one job: to say what is sown where, and when. The simplest markers are wooden lolly sticks or short lengths of batten, written on with a pencil or a permanent marker. Pencil fades; a paint pen or a wax pencil lasts longer. A child can draw a picture of the crop as well as write its name, which helps a pre reader know what is growing.
More durable markers can be made from stones, slate, or the plastic lids of food containers, cut into strips. Painted pebbles make attractive markers and are heavy enough not to blow away. A row of markers along a bed also helps an adult remember what was sown where after a busy month, which is a real practical benefit rather than decoration.
Making it a shared job
Pots and markers are good projects for a group, because everyone can make one and the results go into the same bed. Give each child a pot and a marker, and let them choose what to grow in it. A pot of herbs on a kitchen windowsill, a pot of lettuce by a door and a marker in the vegetable row all come from the same afternoon's work.
Keep the tools simple: brushes, a cloth, a pot of water, a mat. Wash brushes in a jar rather than down a sink, and let the water settle before tipping it out, so paint does not block a drain. Store the finished pots dry and stack them carefully, and store markers in a shed where they will be found next spring.
Drying, finishing and storing
Paint needs time and a dry place. Let the pots dry indoors for a day before the adult applies a clear exterior varnish, and then let the varnish cure for another day before planting. A pot that is planted while the paint is still soft will pick up soil and fingerprints, and the finish will never be as good. Once the varnish is dry, the pot can go outside and will take normal watering and rain without the paint lifting.
At the end of the season, empty the pots, brush off the soil and store them dry and stacked, out of frost. Terracotta that is left full of wet compost through a hard winter can crack, and a painted surface left wet for months will flake. A few minutes of tidying in autumn protects the work of a whole afternoon, and the pots will be ready to plant again in spring.
Where the pots go next
A painted pot can hold almost anything: a herb, a strawberry plant, a single courgette in a large pot, or a small flower. If the pot is to sit outside, make sure it drains and stand it on feet or a tile so water does not pool underneath. A row of painted pots along a step or a path edge makes a small garden out of a paved space, and the guide to growing vegetables in containers explains which crops suit a pot.
Over winter, empty the pots and store them dry, or plant them with a hardy herb and leave them out. Repaint or touch up in spring, and the same pots will serve for years. The wider hub on garden play and crafts places this project alongside the bean teepee, the miniature garden and the sandpit as ways to make a garden that children feel they own.